Silverlightはさまざまな技術から構成されているため、統合環境のサポートが得られないF#での開発は多少骨が折れるように思えます。
ただ、今回のSilverlight導入で作成する簡単なサンプルを作成できるようになれば、あとは他の言語での開発と同じように簡単にSilverlightアプリケーションを作成することができると思います
サンプルの作成を通して、F#でのSilverlightアプリケーションの作成方法をマスターしていただければと思います。
さっそくサンプルの作成に入りましょう。 今回利用した環境は以下になります。
下記のコードをSilverlightSample.fsとして保存します。
#light
namespace SilverlightSample

open System
open System.Windows
open System.Windows.Controls

type MyPage = class
    inherit UserControl

    new () as this = {} then
        let txt = new TextBox(HorizontalAlignment = HorizontalAlignment.Left,
                              VerticalAlignment = VerticalAlignment.Top )
        txt.Text <- "Hello World!!"
        this.Content <- txt
end

type MyApp = class
     inherit Application

     new () as this = {} then
         this.Startup.Add(fun _ ->  this.RootVisual <- new MyPage())
end
SilverlightSample.fsをコンパイルします。
fsc -a SilverlightSample.fs --standalone --noframework --cliroot "C:\Program Files\Microsoft Silverlight\2.0.40115.0" -r System.Windows -r System.Runtime.Serialization -r System.Net
SilverlightSample.dllができあがりました。
エントリポイントやランタイムバージョンなど、AppManifest.xamlに設定を記述します。
●AppManifest
<Deployment xmlns="http://schemas.microsoft.com/client/2007/deployment"
             xmlns:x="http://schemas.microsoft.com/winfx/2006/xaml"
             EntryPointAssembly="SilverlightSample"
             EntryPointType="SilverlightSample.MyApp" RuntimeVersion="2.0.31005.0">
             <Deployment.Parts>
             <AssemblyPart x:Name="SilverlightSample" Source="SilverlightSample.dll" />
             <AssemblyPart x:Name="FSharp.Core" Source="FSharp.Core.dll" />
             </Deployment.Parts>
</Deployment>
作成したファイルと、使用するdllをzip圧縮する。今回は下記のファイルが対象。
zip圧縮した後、sample.xap とリネームする。
Silverlightのプログラム部分は、このように実体はプログラムファイルをzip圧縮した、拡張子xapファイルを配置するルールになっている。
ユーザーがアクセスするページを作成します。 下記をTestPage.htmlとして保存します。
<!DOCTYPE html PUBLIC "-//W3C//DTD XHTML 1.0 Transitional//EN" "http://www.w3.org/TR/xhtml1/DTD/xhtml1-transitional.dtd">
<html xmlns="http://www.w3.org/1999/xhtml" >
<head>
    <title>HelloWorld</title>

    <style type="text/css">
    html, body {
	    height: 100%;
	    overflow: auto;
    }
    body {
	    padding: 0;
	    margin: 0;
    }
    #silverlightControlHost {
	    height: 100%;
    }
    </style>

    <script type="text/javascript">
        function onSilverlightError(sender, args) {

            var appSource = "";
            if (sender != null && sender != 0) {
                appSource = sender.getHost().Source;
            }
            var errorType = args.ErrorType;
            var iErrorCode = args.ErrorCode;

            var errMsg = "Unhandled Error in Silverlight 2 Application " +  appSource + "\n" ;

            errMsg += "Code: "+ iErrorCode + "    \n";
            errMsg += "Category: " + errorType + "       \n";
            errMsg += "Message: " + args.ErrorMessage + "     \n";

            if (errorType == "ParserError")
            {
                errMsg += "File: " + args.xamlFile + "     \n";
                errMsg += "Line: " + args.lineNumber + "     \n";
                errMsg += "Position: " + args.charPosition + "     \n";
            }
            else if (errorType == "RuntimeError")
            {
                if (args.lineNumber != 0)
                {
                    errMsg += "Line: " + args.lineNumber + "     \n";
                    errMsg += "Position: " +  args.charPosition + "     \n";
                }
                errMsg += "MethodName: " + args.methodName + "     \n";
            }

            throw new Error(errMsg);
        }
    </script>
</head>

<body>
	<div id='errorLocation' style="font-size: small;color: Gray;"></div>

    <div id="silverlightControlHost">
		<object data="data:application/x-silverlight," type="application/x-silverlight-2" width="100%" height="100%">
			<param name="source" value="sample.xap"/>
			<param name="onerror" value="onSilverlightError" />
			<param name="background" value="white" />
			<param name="minRuntimeVersion" value="2.0.31005.0" />
			<param name="autoUpgrade" value="true" />
			<a href="http://go.microsoft.com/fwlink/?LinkID=124807" style="text-decoration: none;">
     			<img src="http://go.microsoft.com/fwlink/?LinkId=108181" alt="Get Microsoft Silverlight" style="border-style: none"/>
			</a>
		</object>
		<iframe style='visibility:hidden;height:0;width:0;border:0px'></iframe>
    </div>
</body>
</html>
ここで注目していただきたいのが、下記の部分です。
<param name="source" value="sample.xap"/>
このvalueに先ほど作成したxapファイルを指定する必要があります。
Webサーバーに配置する。
※Silverlight.jsはSilverlight SDKに付属されている。
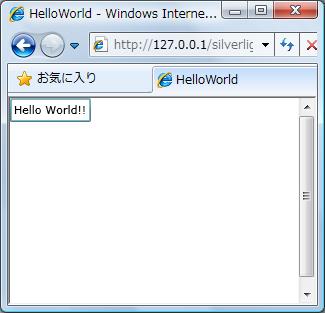
配置したTestPage.htmlにアクセスしてみましょう。